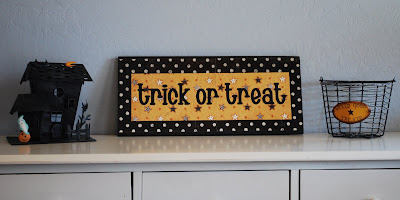
Last year my sister & I made these charming trick or treat signs. It was a little "tricky" to make and it didn't turn out perfect... but I love having it on display in October.
SUPPLIES:
1. 1/2" or 3/4"pine board or other craft board-mine was 22" wide by 10" (actual height 9.25")
2. Craft paint to match your paper
3. 4 sheets of 12x12 scrapbook paper-2 of each pattern
4. Vinyl letters or die cut letters
5. Modge podge
6. Paper Trimmer
STEPS:
1. First you need to paint the board and let it dry thoroughly
2. Cut your outer paper to fit the board, then carefully line up the seams--you may want to use a pencil to mark the spot to keep it lined up--then modge podge the paper on. Let it dry thoroughly.
2. Decide how big you want your inner paper to be--make sure to leave enough room for your lettering--carefully center the paper and line up the seams--then modge podge on. Let it dry!
3. Once it's completely dry you can center your lettering onto the sign. I like to modge podge over the entire thing about 3 times to give it nice smooth finish. Be sure to let it dry 10-15 mins between each coat. And there you have it...a charming accent to your halloween decor.

No comments:
Post a Comment